

With the constant evolution of email security measures and sender authentication, BIMI (Brand Indicators for Message Identification) is emerging as an excellent way to strengthen recipients’ trust. Essentially, it allows your company’s logo to be displayed directly in certain email clients, next to your messages.
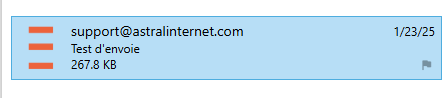
Here is a concrete example of an email with a BIMI record:
In this article, I will explain in detail what BIMI is, how it works, and most importantly, how you can configure a DNS BIMI record so that your emails are accompanied by your customized logo. This is a great opportunity to enhance your brand image and reassure your recipients.
What is BIMI?
BIMI (Brand Indicators for Message Identification) is a standard that allows companies to display their brand logo next to their authenticated emails in recipients’ inboxes. It relies on email authentication protocols such as SPF, DKIM, and DMARC to ensure that the message truly comes from the legitimate sender.
The primary goal of BIMI is to enhance brand recognition while strengthening security against phishing and spoofing attacks.
How does BIMI work?
BIMI doesn’t work on its own. It relies on DMARC, which itself depends on SPF and DKIM. In other words, before going any further, you need to ensure that these three records are properly configured in your domain’s DNS zone. If you haven’t done this yet, I strongly recommend taking care of it first!
- How to properly generate an SPF record and understand its importance
- DKIM: Understanding and Implementing This Essential Tool to Secure Your Emails
- Complete Guide to DMARC Records to Protect Your Emails
Once everything is set up, the BIMI record simply tells your email client where to find the image to display next to your messages. It’s a bit like adding a visual signature to your emails, which is great for strengthening your brand identity.
However, there’s a small detail to keep in mind: some email clients require the image to be validated as a registered trademark before displaying it. In this tutorial, I won’t go into the process of trademark registration or image certification, but be aware that this might be a necessary step depending on the platform you use.
As of the time of writing, some email providers, like Gmail, require a VMC (Verified Mark Certificate) to display the BIMI logo, while others, like Yahoo! Mail, accept self-declared BIMI records without a VMC certificate. This may change in the future.
Creating the BIMI Record
The creation of a BIMI record involves several steps. First, you need to prepare the logo, then create the BIMI record, and finally, add it to your domain’s DNS zone. It’s not particularly complicated, but each step is crucial to ensure everything works correctly.
Creating the Logo for the BIMI Record
You have full creative freedom when designing your logo, but be aware that there are some technical requirements to ensure it is valid and properly displayed. Here are the key criteria to follow:
- The image must be in a vector format and saved with the SVG (Scalable Vector Graphics) extension.
- The background must be a solid color (not transparent).
- BIMI requires a colored background to prevent logos from disappearing on certain user interface backgrounds (e.g., dark mode).
- Some email clients displaying BIMI use backgrounds that might not work well with a transparent logo.
- The file size must not exceed 32 KB.
Once these steps are complete, it is crucial to ensure that your file complies with the Portable/Secure SVG (SVG P/S) profile. This is a stricter version of SVG Tiny 1.2, specifically designed to meet BIMI’s requirements.
Luckily, you don’t have to struggle with this conversion! The team behind BIMI has developed tools to convert a standard SVG file into SVG P/S. You can find these tools on GitHub.
Publishing Your Logo
For your logo to be recognized and displayed correctly by various email providers and clients, it must be accessible online. This means your SVG file must be hosted on a secure server with an SSL certificate.
In other words, the URL of your logo must start with https:// instead of http://. Without this, some email providers may not recognize it.
If you need SSL hosting, keep in mind that all our shared hosting plans include an SSL certificate. This means you’ll be fully equipped to publish your logo securely!
Verifying Your DMARC Record
Before adding a BIMI record, it is essential to ensure that your DMARC record is properly configured. BIMI only works if DMARC is in place and meets certain criteria.
Having a DMARC record is not enough; it must comply with these two key rules:
- The domain and subdomain policy cannot be set to none. It must be configured as quarantine or reject. For example: “
p=reject; sp=reject;“. - The policy must apply to 100% of emails. This means your DMARC record must include the following element: “
pct=100;“.
If your DMARC policy is set to p=none, BIMI will not be supported by certain email providers, preventing your logo from being displayed.
If you are unsure about your DMARC configuration, I recommend using an online DMARC verification tool or checking directly in your DNS zone.
Ensuring that DMARC is properly set up is the first step to making your logo appear correctly in compatible inboxes.
Creating the BIMI Record
The BIMI record is actually a TXT record that you need to add to your domain’s DNS zone. It consists of three main parts. Here is an example of a BIMI record:
v=BIMI1; l=https://yourdomain.com/my-bimi-image.svg; a=
Explanation of the elements:
v=BIMI1: Specifies the BIMI standard version.l=https://yourdomain.com/my-bimi-image.svg: This is the URL where your logo is hosted in SVG format. You should replace this address with the actual location of your own logo.a=: (Optional) This field is used to include a VMC (Verified Mark Certificate) if your logo is officially registered as a trademark.
Adding the BIMI Record to Your DNS Zone
Once your BIMI record is ready, you need to integrate it into your DNS zone. To do this, create a new TXT record with the subdomain default._bimi and insert your BIMI entry.
Example of DNS zone entry:
- Name:
default._bimi.yourdomain.com. - Type:
TXT - Value:
v=BIMI1; l=https://yourdomain.com/my-bimi-image.svg; a=
Once the record is in place, you will need to wait a few hours (or up to 24–48 hours) for DNS propagation to complete. After that, your logo should start appearing in compatible email clients.
Verifying Your BIMI Record
The final step, while optional, is highly recommended: ensuring that your BIMI record is working correctly. There’s nothing worse than setting everything up only to realize later that something isn’t working!
Traditional Method: Test Email
The simplest way to test BIMI is to send an email from your address to someone (or yourself) using a compatible email client or interface, such as SmarterMail. If everything is properly configured, your logo should appear next to the email.
Using Online Tools
If you want a more detailed diagnosis, there are online tools that allow you to check your BIMI record and ensure that all steps have been correctly followed. Here are my two favorite tools:
- BIMI Inspector: Provides an in-depth analysis of your BIMI configuration.
- MXToolbox BIMI Lookup: Checks your BIMI record and detects potential configuration issues.
These tools will help you identify possible errors and confirm that your logo is properly supported by compatible email services.
A Note on Verified Mark Certificates (VMC)
It is possible to certify your logo with a VMC (Verified Mark Certificate). Once certified, your logo will be guaranteed to display in all email clients and interfaces that support BIMI records. However, this process is more time-consuming and expensive.
Steps to Obtain and Apply a VMC Certificate
- Register Your Logo as an Official Trademark
- This process can take between 6 months and a year.
- It is recommended to work with a law firm specializing in trademarks to ensure that all steps are properly followed.
- Purchase a VMC Certificate from a Recognized Authority
- The Certification Authority (CA) must verify your identity before issuing a VMC certificate. This validation can be done in several ways: In person, via video conference, through notarial authentication. The exact method depends on the issuing authority.
- Publish the Obtained Certificate
- The certificate is usually provided as a file with a .PEM extension.
- This file must be hosted on a public web server, ideally in the same location as your BIMI logo.
- Add the Certificate Location to Your BIMI Record
- Simply include the URL of the certificate in your BIMI record using the a= tag.
Using a VMC certificate increases the likelihood that your logo will be properly recognized and displayed, especially as email providers adopt stricter authentication policies.
Conclusion
Setting up a BIMI record may seem technical at first, but by following the steps outlined in this article, you should be able to proudly display your logo next to your emails. This small detail can make a big difference by strengthening brand recognition and inspiring greater trust among your recipients.
Key Takeaways for a Successful BIMI Setup:
- DMARC must be properly configured with a quarantine or reject policy applied to 100% of emails.
- Your logo must meet technical requirements (SVG format, non-transparent background, file size under 32 KB).
- The image must be hosted on a secure server (with an SSL certificate).
- The BIMI record must be correctly added to your DNS zone under the subdomain default._bimi.
- A final verification with a test email and specialized tools is strongly recommended to ensure everything is working correctly.
BIMI is a great way to enhance your brand’s visibility and legitimacy in email inboxes. While its adoption is still in progress among some email providers, it represents the future of visual email authentication.
If you haven’t implemented BIMI yet, now might be the perfect time to take the leap and give your email communications an even more professional image!
Leave a Reply